
Inside Cabinet Cleaning: One Cabinet at a Time, No Weekend Required
Warm water, a few drops of pH-neutral dish soap, and a barely damp microfiber cloth clean cabinet interiors safely and completely, without touching bleach or ammonia. Empty crumbs and debris first, wipe top to bottom, then dry the surface right away so wood never sits wet. If you want extra grease-cutting power, a 50/50 vinegar and water mix works, but only after you’ve tested it on a hidden spot inside the cabinet.
TL;DR:
- Regularly vacuum cabinets before wiping to prevent grease and debris from turning into sticky paste when damp cloths are used.
- Use a mild, pH-neutral dish soap solution for most cabinets, and test vinegar water on hidden spots to avoid finish damage.
- Deep cleaning a single cabinet usually takes less than an hour, with a full deep clean achievable within a few sessions depending on buildup.
- Proper drying and restraint with excessive moisture are more critical than cleaning product choice to prevent damage or warping of cabinet finishes.
- Professional cleaning services can save time, ensure thorough results, and are recommended for heavily encrusted grease or large or multiple cabinets.
Table of Contents
- Supplies and Prep for Inside Cabinet Cleaning
- How to Clean Inside Cabinets Step by Step
- Which Cleaning Method Fits Your Cabinet Material?
- What Removes Grease and Sticky Residue Best?
- Cleaning Cabinet Hardware, Hinges, and Drawer Tracks
- How Often Should You Deep Clean Cabinet Interiors?
- When Does Cabinet Cleaning Call for a Professional?
- What Actually Matters Most in This Whole Process
- Get a Spotless Kitchen Without Spending Your Weekend on It
- Sources
Supplies and Prep for Inside Cabinet Cleaning
You don’t need a cart full of specialty products for this job. A short supply list and ten minutes of prep will save you from redoing work later.
Gather these before you start:
- Microfiber cloths (at least two, one for washing and one for drying)
- A soft sponge for stuck-on spots
- A bucket and a spray bottle for your cleaning solution
- A vacuum with a crevice tool attachment
- An old toothbrush for corners and hinges
- A lint-free drying cloth
For your cleaning solution, mix warm water with a few drops of pH-neutral dish soap. If you’re dealing with grease buildup, a 1:1 distilled white vinegar and water mix cuts through everyday grime, but always test it on an inconspicuous interior spot first, since finishes react differently to acid.
Clear your counters so you have somewhere to set cabinet contents, then tackle one or two cabinets at a time instead of gutting the whole kitchen at once. Pull out any shelf liners before you start wiping, and sort items as you go. Check expiration dates while everything is out of the cabinet. That single habit turns a cleaning chore into a small kitchen audit.
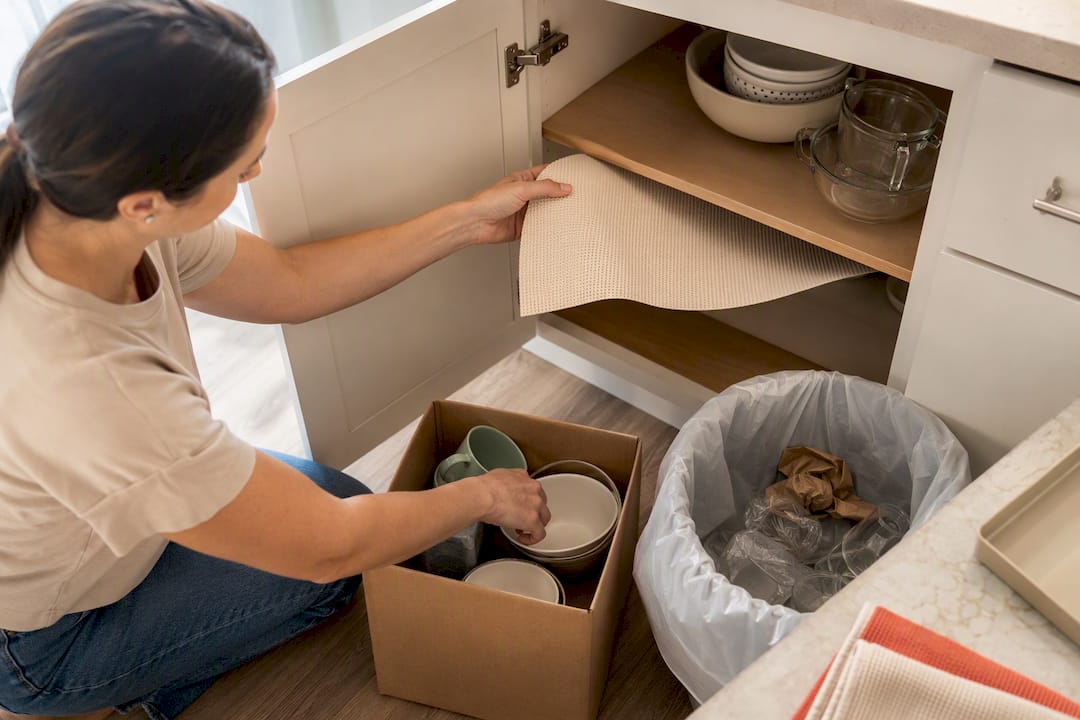
Pro Tip: Keep a trash bag and a donation box next to you while you empty each cabinet. Sorting as you clean means you won’t have to touch the same items twice.
How to Clean Inside Cabinets Step by Step
This workflow keeps the mess contained and protects your cabinet finish at every stage. Follow it in order, and don’t rush the drying step.
-
Empty one or two cabinets at a time. Pull everything out, check for expired food or products, and set items aside on your cleared counter. Working in small sections keeps the project manageable and prevents you from feeling stuck halfway through with cabinets and countertops both covered in clutter.
-
Vacuum before you wipe anything. Use the crevice tool to pull out crumbs, dust, and loose debris. Skipping this step is the fastest way to turn dry flour or crumbs into a sticky paste the moment your damp cloth touches it. If there’s a shelf liner, lift it out now.
-
Wring your cloth until it’s barely damp, then wipe top to bottom. Gravity pulls loosened grime downward, so working from the top of the cabinet down avoids re-dirtying spots you already cleaned. For greasy corners or built-up residue, go over the area a second time with a little more pressure, or switch to your soft sponge.
-
Rinse and wipe again to remove soap film. Soap residue left behind attracts dust just as fast as grease does, so a second pass with a clean, rinsed cloth matters more than most people realize. Dry the interior thoroughly with your lint-free cloth afterward. If the cabinet feels the least bit damp, leave the doors open for fifteen or twenty minutes before restocking.
-
Replace liners and reorganize as you restock. This is your chance to group similar items, add bins for small containers, and place frequently used items at eye level. A full kitchen cleaning checklist can help you plan the whole space if you’re tackling more than just the cabinets in one sitting.
A deep clean of a single cabinet section typically runs under an hour depending on how much buildup you’re working with and how many items need sorting. If you’re mapping out a bigger project, realistic time estimates for a full deep clean can help you budget your afternoon accurately.
Which Cleaning Method Fits Your Cabinet Material?
Not every cabinet interior reacts to cleaners the same way, and this is where a lot of well-meaning cleaning jobs go wrong. The material behind your cabinet doors decides what you can safely use.
- Painted cabinets: Stick to a very mild soap solution. Skip scouring pads and anything high in acidity, since both can strip or dull paint over time. Dry the surface promptly. Paint holds moisture longer than sealed wood, and lingering dampness is what causes peeling down the road.
- Stained or varnished wood: Use as little water as possible. Test vinegar on a hidden spot before using it anywhere visible, and if you want extra reassurance, look for a wood cleaner labeled safe for interior cabinet surfaces.
- Laminate and metal interiors: These handle mild detergent and gentle scrubbing well, but avoid sharp abrasive pads that can scratch the surface permanently.
- Glass cabinet doors: Spray your cleaner onto the cloth, never directly onto the glass. Buff dry immediately so cleaner doesn’t drip down onto wood trim below.
Bleach or ammonia-based cleaners can dull or damage cabinet finishes across nearly every material listed here, which is why mild soap stays the safer default no matter what your cabinets are made of.
What Removes Grease and Sticky Residue Best?
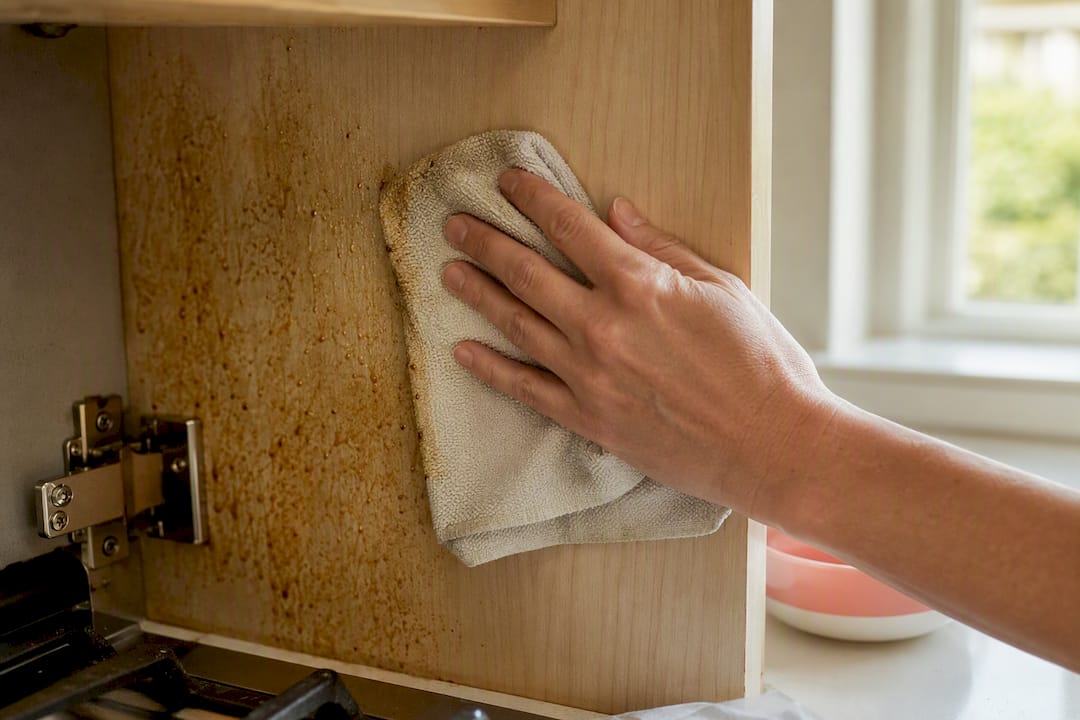
Grease is the problem that sends most people searching for cabinet cleaning advice in the first place, and it usually builds up fastest on cabinets closest to the stove.
Dish soap mixed with warm water remains the most reliable starting point. A Dawn dish soap and warm water routine consistently cuts through grease while staying gentle enough for most finishes. Let the solution sit on stubborn spots for a minute or two before you wipe, rather than scrubbing right away.
For gummy residue that soap alone won’t budge:
- Mix baking soda with a small amount of water into a paste.
- Apply it directly to the spot and let it sit for a few minutes.
- Gently scrub with a soft brush, then wipe clean and dry the area completely.
For heavy grease that’s been building for months, a citrus-based degreaser can help, but spot-test it first and never use bleach inside cabinets that store food. For lingering odors, an open box of baking soda left inside for a few days absorbs a surprising amount, or you can wipe surfaces with diluted vinegar and prop the doors open to air out overnight.
Cleaning Cabinet Hardware, Hinges, and Drawer Tracks
Knobs, handles, and hinges collect just as much grime as the shelves, and they’re easy to overlook because they don’t look dirty at a glance.
- Remove hardware when it’s practical to do so, and soak pieces in warm soapy water for a few minutes before wiping dry and reattaching.
- Use an old toothbrush and a damp cloth to clean hinges and drawer tracks, working into the corners where dust and grease collect.
- Dry hardware fully before reattaching, and add a light drop of lubricant to sticky hinges if needed.
- If you have delicate or uncoated metal hardware, clean those pieces separately from the wood so moisture or cleaner residue doesn’t stain the surrounding finish.
How Often Should You Deep Clean Cabinet Interiors?
A realistic maintenance schedule keeps you from ever facing a cabinet disaster again. Wipe up spills the moment they happen. A splash of oil or a dropped jar of honey only takes thirty seconds to clean when it’s fresh, but it turns into a scrubbing project after a week.
For weekly upkeep, a quick wipe of high-touch shelves, like the one under your sink or near the stove, keeps grime from accumulating between deeper sessions. A full interior deep clean every three to twelve months is reasonable for most households, depending on how much you cook and how close your cabinets sit to the stove.
- Use shelf liners to catch spills before they reach the wood.
- Wipe jars and bottles before returning them to the shelf, since sticky residue on the outside of containers transfers straight onto your shelves.
- Run your range hood while cooking and use a splatter screen for frying, both of which cut down significantly on airborne grease.
- Declutter and check expiration dates each time you clean, which prevents expired food buildup and keeps pests from finding a reason to move in.
Pro Tip: Set a phone reminder tied to a season change, like the first week of spring and fall. Two deep cleans a year is enough for most kitchens and easy to remember once it’s routine.
When Does Cabinet Cleaning Call for a Professional?
Some situations are worth handing off, and there’s no shame in recognizing when your time is better spent elsewhere. A kitchen with years of built-up grease, an unusually large number of cabinets, or a tight moving deadline all change the math.
Hiring a professional makes sense when:
- You’re preparing a home for move-in or move-out and need every cabinet spotless on a deadline.
- You’re managing an Airbnb turnover and don’t have hours to spend between guest stays.
- Grease buildup has hardened to the point that DIY methods aren’t cutting it.
- You’d rather guarantee a thorough result than spend a weekend testing cleaners.
A professional team brings the same finish-safe judgment covered here, but with the speed of doing it daily: full debris removal, products matched to your cabinet material, and attention to hinges and tracks that often get skipped in a rushed clean. Professional cleaning services build this kind of thorough interior attention into every deep clean, and some include complimentary fridge cleaning at no extra charge.
What Actually Matters Most in This Whole Process
Most cabinet cleaning advice buries the real lesson under a pile of product recommendations. The products barely matter. Dish soap and water handle the vast majority of what’s inside a typical kitchen cabinet, and the vinegar and baking soda options exist for the minority of tougher jobs. What actually determines whether you damage a finish or protect it is patience with drying and restraint with cleaners.
The conventional wisdom oversells specialty cabinet sprays and undersells the danger of over-wetting wood. A cabinet interior that stays damp for hours is more likely to warp or peel than one cleaned with the “wrong” mild soap. If you take one thing from this guide, prioritize the drying step over the product choice.
The other overlooked piece is timing. Cleaning cabinets while sorting contents turns a chore into a decluttering session, and that’s where the real long-term payoff sits, not in which cleaner you grab off the shelf.
— Luka
Get a Spotless Kitchen Without Spending Your Weekend on It
Professional cleaning services offer finish-safe, cabinet-by-cabinet attention as described above, saving you hours of scrubbing and uncertainty about safe cleaners. Such services typically include teams that treat hinges, tracks, and interior shelves with care, sometimes including complimentary fridge cleaning.

If your kitchen needs more than a quick wipe down, the deep cleaning service covers cabinet interiors as part of a full kitchen reset, and it’s a solid fit before a big event, after a long stretch without deep cleaning, or whenever grease buildup has gotten past the DIY stage. Moving soon? The move-in and move-out cleaning package handles cabinets along with the rest of the home so you’re not scrubbing shelves the night before handing over keys. Get your instant estimate in under a minute and book a time that works for your schedule.
Sources
- How to clean kitchen cabinets like a pro — Ask a Cabinetmaker
- How often should you be cleaning your kitchen cabinets? — The Kitchn
- How to clean greasy kitchen cabinets, according to cleaning pros — Good Housekeeping
- How to clean wood cabinets — The Spruce