
A Move-In Cleaning Checklist for a Truly Fresh Start
A printable move-in cleaning checklist gets an empty home genuinely clean before a single box comes through the door, and that order matters more than most people realize. Once furniture and boxes arrive, you lose access to the corners, cabinet backs, and floor edges where dust, grease, and old allergens actually live.
Here’s what a solid checklist covers and why the timing matters as much as the tasks themselves.
- Rooms: kitchen, bathrooms, bedrooms, closets, living areas, and utility spaces
- Top tasks: appliance interiors, inside cabinets, vents and filters, baseboards, and floors last
- Timing: the day before movers arrive, or at minimum before boxes and furniture go in
- Sequence: top to bottom, room to room, floors always last
Cleaning an empty house is the most health-protective way to start, because previous occupants leave behind bacteria, pet dander, mold spores, and construction dust that a quick once-over misses, according to Coastal Moving Services. The CDC’s disinfection guidance backs up the “why” behind ventilation and PPE, and The Spruce lays out a supply list worth packing before you pack anything else. If the job looks bigger than a Saturday afternoon, Limpieza Tropical handles move-in cleaning across Miami-Dade with a local team and an instant online quote.
Key Takeaways
A clean new home depends on the right order (top to bottom, kitchen and bathrooms first, floors last) and the right timing (before movers, not after).
| Point | Details |
|---|---|
| Pack a first-day kit | Assemble disinfectant, microfiber cloths, and a vacuum, and deliver it before boxes arrive. |
| Clean top to bottom | Start with fixtures and vents, then cabinets and counters, and finish with floors. |
| Prioritize kitchen and bathrooms | These two rooms decide whether the whole home feels clean or not. |
| Swap the HVAC filter | Replace it before running the system to avoid circulating dust and odors. |
| Know when to call a pro | Mold, heavy pet damage, or construction dust are signs to hire Limpieza Tropical instead of DIYing it. |
Table of Contents
- What Goes Into Your Move-In Cleaning Kit
- Why Walk Through the Whole House First
- Kitchen Cleaning: Appliances, Cabinets, and Grease
- Bathrooms: Grout, Fixtures, and Sanitizing
- Bedrooms and Closets: Getting Ahead of Dust
- Living Rooms, Entryways, and Utility Spaces
- Getting Floors, Carpets, and Rugs Actually Clean
- The Small Details: Windows, Walls, Doors, and Trim
- HVAC, Vents, and Getting the Air Right
- Cleaning Order and How Long Each Room Really Takes
- Deciding Between DIY and a Professional Move-In Clean
- Final Steps Before a Single Box Gets Opened
- What a Move-In Cleaning Job Actually Teaches You
- If You’d Rather Hand This Off to a Local Team
- Sources
What Goes Into Your Move-In Cleaning Kit
Before you touch a single cabinet, get your supplies in one place. Running back to the store mid-clean is the fastest way to lose momentum, and in an empty house, every trip feels longer than it should.
Pack a kit with:
- All-purpose disinfectant cleaner
- Glass and mirror cleaner
- A stack of microfiber cloths (at least a dozen)
- Vacuum with a telescopic wand and crevice attachment
- Mop and bucket, plus a separate scrub brush for grout
- Oven degreaser and appliance-specific cleaner
- Heavy-duty sponges and a scraper for stuck-on grime
- Rubber gloves and a small step ladder
- Trash bags, paper towels, and a spray bottle for diluting concentrates
The Spruce recommends assembling this exact kind of “first-day” kit and getting it to the house before boxes or furniture, so you can work room to room without interruption. Label the bin clearly, load it in your own car rather than the moving truck, and treat it as the first thing that crosses the threshold, not the last.
Pro Tip: Toss an old toothbrush and a flathead putty knife into your kit. Both are surprisingly good at scraping dried caulk, price stickers, and gunk out of grout lines and appliance seals that a sponge alone won’t touch.
Why Walk Through the Whole House First
Before you clean anything, walk every room with fresh eyes, including closets, under sinks, the attic access, and the garage. This is your one chance to see the space completely empty, and it’s the best time to catch problems before furniture covers them up.

Bring your phone and photograph anything questionable. If you’re renting, this record protects your security deposit; if you own, it flags repairs before you’ve settled in and forgotten what the walls looked like on day one.
Mark down:
- Water stains on ceilings or under sinks
- Musty or moldy smells, especially in bathrooms and basements
- Gaps around HVAC vents or window frames
- Missing light bulbs or non-functioning outlets
- Pest droppings in cabinets, closets, or along baseboards
- Leftover debris, nails, or construction material in corners
This walkthrough also shapes your cleaning plan. A moldy bathroom exhaust fan or a garage full of sawdust changes what you tackle first and whether you need a professional for part of the job.
Kitchen Cleaning: Appliances, Cabinets, and Grease
The kitchen collects more grime than any other room, and it rewards a strict order of operations. Work high to low: light fixtures and ceiling fans first, then cabinets and drawers, then appliance interiors, then counters, then the sink, and floors dead last.
- Wipe down light fixtures and any ceiling fan blades with a dry microfiber cloth to knock dust down before it resettles on clean counters.
- Empty and wipe every cabinet and drawer inside and out, checking corners for crumbs or old shelf liner residue.
- Clean the refrigerator: pull out shelves and bins, wash them in the sink with warm soapy water, and wipe interior walls with disinfectant.
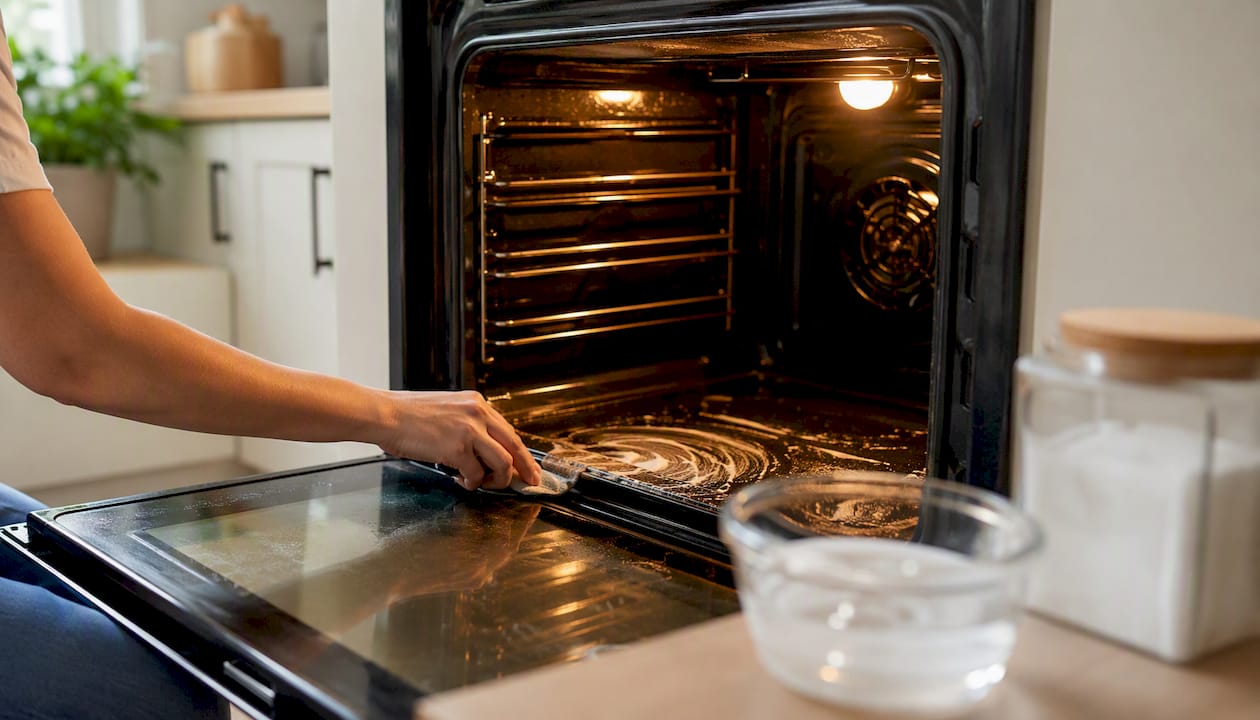
- Degrease the oven, starting with the racks, then the interior walls and door glass; let degreaser sit per the product’s instructions before wiping.
- Run the dishwasher empty on a hot cycle with a cleaning tablet or a cup of white vinegar to clear residue and odors.
- Wipe the microwave interior, including under the turntable, and clean the range hood filter with hot soapy water.
- Scrub counters and backsplash, then finish with the sink and garbage disposal (a few ice cubes and citrus peels run through the disposal cuts odor fast).
- Mop the floor last, working from the far corner toward the doorway.
Open every appliance and check what’s inside before you call it done. Fridge bins hold crumbs, oven drip pans hold burnt-on residue, and dishwasher filters trap old food particles that smell within days if ignored.
Pro Tip: For baked-on oven grime, skip the store-bought spray and make a paste of baking soda and water. Let it sit overnight, then wipe it out in the morning. It costs pennies and it works better than most aerosol degreasers.
Bathrooms: Grout, Fixtures, and Sanitizing
Bathrooms need a top-to-bottom approach too, and cross-contamination is the real risk here, not just visible dirt. Start with the exhaust fan and light fixtures, move to the shower and tub, then tile, then the toilet, then the sink and vanity, and finish with the floor.
- Dust the vent cover and light fixtures, since these often carry bathroom-specific buildup like dried soap film in the air.
- Scrub the shower and tub with a grout brush, working cleaner into the lines rather than just across the surface.
- Treat calcium and mineral deposits around faucets and showerheads with a descaler or a vinegar soak, letting it sit before scrubbing.
- Clean the toilet inside and out, including the base and behind the bowl, using a dedicated cloth you won’t reuse elsewhere.
- Empty and wipe the vanity, including inside drawers and under the sink where leaks often leave residue.
- Pour a deodorizing treatment down slow or smelly drains, and run hot water through afterward.
- Wipe the mirror, then mop the floor last.
Ventilate the room before you open any bleach-based product, and never mix bleach with ammonia-based cleaners. The CDC’s guidance on chemical disinfectants recommends proper ventilation and protective gloves any time you’re using stronger disinfectants, and it’s worth testing a strong descaler in a hidden spot first if you’re unsure how the surface will react.
Pro Tip: Let your grout cleaner sit for a full 10 minutes before scrubbing. Most people rinse too early and end up scrubbing twice as hard for half the result.
Bedrooms and Closets: Getting Ahead of Dust
Empty bedrooms give you an advantage you won’t have again for years: full access to every corner, shelf, and window track without furniture blocking the way. Clean ceiling fixtures first, wipe windows and their tracks, vacuum or sweep the floor, and wipe closet shelves and rods before a single shirt goes on a hanger.
- Check built-in closets and shelving for dust buildup in corners and along the tops of shelves.
- Look for small pests or webbing in closet nooks, especially in homes that sat vacant before your move.
- Wipe rods and shelf edges with disinfectant before hanging clothes, since these surfaces collect more grime than people expect.
- Add shelf liners now if you plan to use them, since it’s far easier without clothing in the way.
- Set out moisture absorbers in closets prone to humidity, particularly useful in South Florida’s climate.
This is also the easiest room to skip, precisely because it looks clean already. Don’t. A quick wipe now saves you from discovering a dusty shelf liner after your sweaters are already stacked on it.
Living Rooms, Entryways, and Utility Spaces
Shared spaces don’t need the same intensity as kitchens and bathrooms, but a few targeted tasks make the whole house feel finished. Dust light fixtures, ceiling fans, baseboards, vents, and window sills, and wipe every switch plate and door handle you pass.
Clean built-in shelving, fireplace surrounds, and media cabinets before you install electronics or unroll a rug. It’s far easier to wipe down an empty shelf than to work around a stereo system and a tangle of cables.
Utility rooms and garages need their own pass. Wipe the interior of the washer and dryer, including the dryer’s lint trap housing and the washer’s detergent drawer, and check laundry hookups for leaks or corrosion. Sweep garages and mudrooms and clear out any leftover debris from the previous occupants. If you’re setting up a laundry routine in the new space, Limpieza Tropical’s standard cleaning service can fold laundry maintenance into a recurring plan once you’re settled.
Getting Floors, Carpets, and Rugs Actually Clean
Floors always come last in every room, and for good reason: everything above them, from dust knocked loose off shelves to grime wiped off cabinets, ends up on the floor eventually. Vacuum edges and corners first, then deep clean using the method suited to the surface.
- Vacuum every room, including corners, closets, and under any built-in furniture, before wet cleaning anything.
- Mop hard floors with a cleaner matched to the material. Vinegar-based solutions work on tile but can dull certain wood finishes, so check the flooring type first.
- Run a steam cleaner or rent a carpet-cleaning machine on carpeted rooms, focusing extra time on high-traffic paths and any visible staining.
- Treat individual stains before a full carpet clean; blot rather than scrub, and test any stain remover on a hidden patch first.
- Let carpets dry fully, ideally with windows open or a fan running, before placing furniture back down.
Wood floors respond best to a slightly damp mop and a wood-safe cleaner, never a soaking wet one. Laminate hates standing water almost as much as wood does. Tile is the most forgiving surface here and can handle a stronger cleaner without much risk.
If the previous owners had pets, if staining runs deep, or if there’s a lingering odor you can’t place, renting a steam machine yourself often isn’t enough. That’s the point where a professional carpet clean earns its cost, particularly if you’re moving in with kids or anyone with allergies.
The Small Details: Windows, Walls, Doors, and Trim
The details that make a home look genuinely finished are also the ones people skip when they’re tired and ready to unpack. Clean windows inside and out, including the tracks where dust and dead bugs collect. Wipe down walls to catch scuffs and fingerprints, clean door frames and knobs, and run a duster over crown molding and vent covers.
- Baseboards collect a surprising amount of dust and deserve a wipe-down before furniture goes against them.
- Touch up any obvious scuffs on baseboards or trim with a bit of matching paint if you have it on hand.
- Check door hinges and knobs for grime buildup, especially on older or previously rented homes.
- Wipe crown molding and any decorative trim with a dry duster, then a damp cloth for stuck-on dust.
Pro Tip: Always run a dry microfiber cloth over glass and trim before the damp one. Skipping the dry pass is the number one reason people end up with streaky windows and have to redo the whole job.
HVAC, Vents, and Getting the Air Right
Before you run the heat or air conditioning for the first time, replace the HVAC filter. This single step keeps dust, allergens, and lingering odors from previous occupants from circulating through the entire house the moment the system kicks on.
- Remove vent covers throughout the house and wash them in warm soapy water.
- Vacuum return air vents and the area immediately around them.
- Replace the HVAC filter and consider a full duct inspection if the home was recently renovated or shows visible construction dust.
- Run an air purifier for the first few days in a newly built home to help off-gassing dissipate before you unpack textiles like curtains and rugs.
Older or previously occupied homes benefit from a filter upgrade and a thorough vent wipe-down, according to Coastal Moving Services. New-construction homes carry a different concern: fresh paint, adhesives, and flooring materials release volatile organic compounds for weeks after installation, so ventilation matters even more.
Pro Tip: If you spot dark spots or a musty smell inside a vent, don’t scrub it yourself and hope for the best. Significant mold in ductwork needs a professional remediation service, not a spray bottle.
Cleaning Order and How Long Each Room Really Takes
The professional sequence is simple once you see it laid out: ceilings and fixtures first, then counters, then cabinets, then appliances, then floors. Room order follows the same logic. Kitchen first, since it’s the messiest, then bathrooms, then bedrooms, then living spaces, then utility areas.
Scheduling matters just as much as sequence. Clean the day before the moving truck arrives, not after, since foot traffic from movers will redeposit dust and debris on surfaces you just finished, according to Extra Space Storage. A morning-and-afternoon split works well for most homes: mornings for the kitchen and bathrooms, afternoons for bedrooms and common areas.
| Point | Details |
|---|---|
| Kitchen | A full appliance-and-cabinet clean requires several hours, varying with kitchen size and condition. |
| Bathrooms | Each bathroom typically takes under an hour to clean thoroughly. |
| Bedrooms and closets | Bedrooms and closets generally take under an hour each to clean. |
| Living areas and utility | Living areas and utility rooms require a couple of hours combined, depending on features. |
- Block a full day for a standard three-bedroom home if you’re doing it solo.
- Add extra time for any room flagged during your walkthrough, especially anything involving mold or heavy grease.
- If you’re on a tight moving timeline, tackle the kitchen and bathrooms yourself and consider a pro for the rest.
Deciding Between DIY and a Professional Move-In Clean
Some homes just need more than a weekend and a bucket of supplies can realistically deliver. Heavy pet damage, visible mold, thick construction dust, years of built-up grease, or simply not having the time are all legitimate reasons to call in a professional move-in cleaning team.
Before booking anyone, ask a few direct questions:
- Does the service clean inside cabinets and appliances, or just visible surfaces?
- What supplies and protective equipment does the team bring?
- Is the company insured and bonded?
- How long will the job take for a home your size?
- Which specific tasks are guaranteed, and which cost extra?
Cost is the other piece of the decision. Industry pricing guides show deep-clean rates rising with square footage, which makes sense given how much more surface area a larger home involves, according to FreshBooks’ 2025 pricing data.
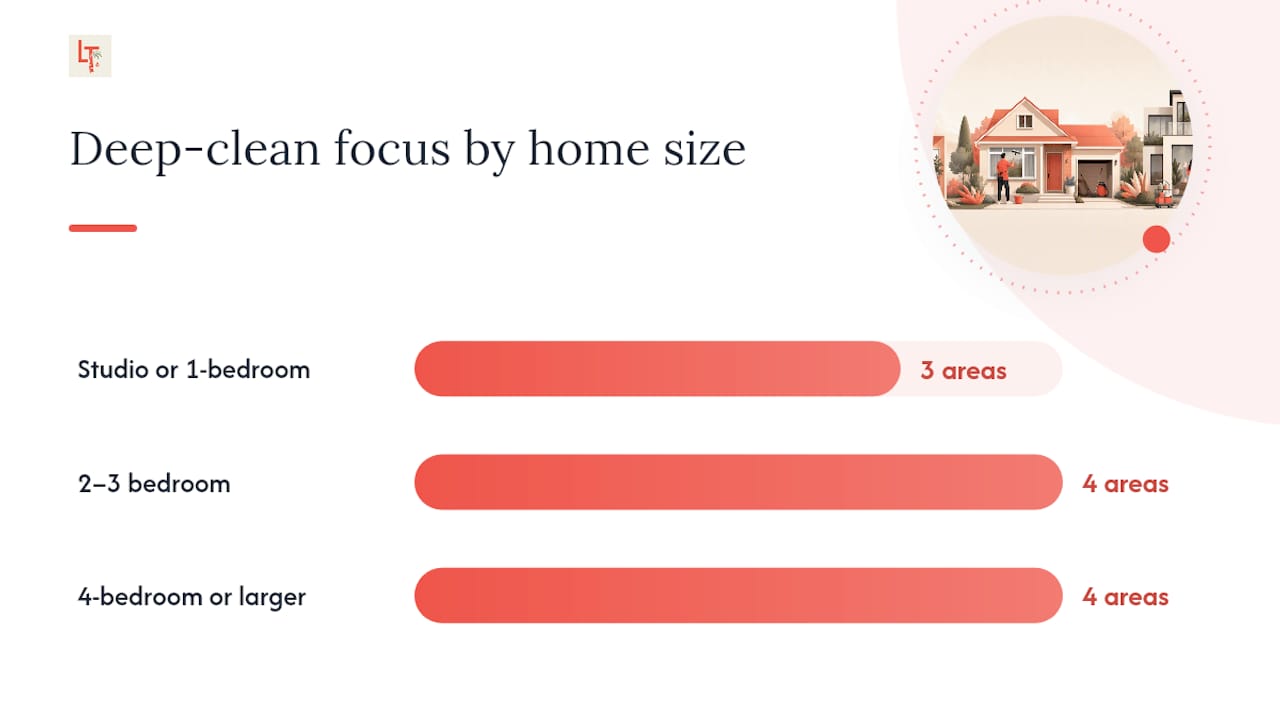
| Home Size | Typical Deep-Clean Focus |
|---|---|
| Studio or 1-bedroom | Appliance interiors, one bathroom, closets |
| 2 to 3-bedroom | Full kitchen, two bathrooms, all bedrooms and living space |
| 4-bedroom or larger | Multiple bathrooms, larger kitchen, utility room, garage sweep |
If your walkthrough turned up mold, pest evidence, or construction debris, that’s usually the tipping point where a professional service pays for itself in saved weekends. Limpieza Tropical’s move-in and move-out cleaning service covers exactly this kind of deep, cabinet-and-appliance-inclusive clean across Miami-Dade.
Final Steps Before a Single Box Gets Opened
Walk through every room one more time with your checklist in hand before you open a single box. Photograph anything that still looks off, and if you swapped the HVAC filter earlier, write the install date on it with a marker so you know when it’s due for the next change.
Give high-touch surfaces one last wipe: light switches, door handles, cabinet pulls, and any remote controls left behind by the previous occupants. These are the surfaces hands touch dozens of times a day, and they’re the easiest to forget once cleaning fatigue sets in.
Break down and recycle cardboard packing materials as they empty, and bag up used cleaning rags, empty spray bottles, and any leftover debris before it piles up in a corner. A family guide to post-move unpacking recommends setting aside a small first-night box with essentials like sheets, toiletries, and a phone charger, so you’re not rummaging through forty boxes at 10 p.m. looking for a toothbrush. If you’re dealing with outdoor trash bins from the previous owner, a guide to sanitizing garbage bins covers the deeper disinfecting steps worth doing before your first trash day.
What a Move-In Cleaning Job Actually Teaches You
After enough move-in jobs, a pattern becomes obvious: the kitchen and bathrooms decide whether a home feels clean, no matter what else gets done. Get those two rooms right, and everything else reads as a bonus. Skip them, and no amount of dusted baseboards will fix the impression.
One habit worth stealing from professional teams is finishing a room completely before moving to the next one, rather than doing a light pass through the whole house first. It feels slower in the moment, but it stops the frustrating cycle of walking back into a “done” room to fix something you missed.
Limpieza Tropical’s teams handle this exact job across Miami-Dade regularly, and the instant estimate tool exists because most people calling about a move-in clean are already stressed and don’t want to wait on a callback to find out if it’s even worth it.
If You’d Rather Hand This Off to a Local Team
Limpieza Tropical is the option for anyone who read this checklist and thought, “not this weekend.” Instead of renting a steam cleaner, buying six different specialty sprays, and blocking off a full Saturday, one booking gets a local team into your new home with everything already covered.

The move-in and move-out cleaning service covers inside cabinets, appliance interiors, vents, baseboards, and floors, the exact task list this article just walked through. A few things make it easier than piecing the job together on your own:
- All supplies are included, so nothing gets left off a shopping list.
- The same local team gets assigned to your job, so there’s no revolving door of strangers.
- Every visit includes a complimentary fridge cleaning, one less appliance to scrub yourself.
- Service covers Miami, Homestead, Kendall, Cutler Bay, Coral Gables, and the surrounding area.
Recurring clients also get access to discounted weekly, biweekly, or monthly plans, useful once the deep clean is done and you just want the house to stay that way. Head to Limpieza Tropical’s services page and run the instant estimate to see a price in about 60 seconds, no callback required.
Sources
A few sources go deeper than this checklist could cover on its own. The CDC’s chemical disinfection guidance is worth bookmarking for anyone using stronger cleaning products regularly. The Spruce’s new-home cleaning guide breaks down supply choices in more detail than a single checklist allows, and Lowe’s move-in cleaning guide offers another room-by-room reference if you want a second opinion on sequencing. For keeping things clean after the initial push, The Simplicity Habit’s 6/10 cleaning rule is a practical maintenance system worth adopting once the boxes are unpacked.
- How to Clean a New Home | The Spruce
- New House Cleaning Checklist - Coastal Moving Services
- Ultimate Move-In Cleaning Checklist For Your New Home — Extra Space
- Disinfection methods: chemical disinfectants | CDC
- How Much to Charge for House Cleaning: 2025 Pricing Guide — FreshBooks